Although I use many of the Azure services as part of my day job as a web developer, one I’ve never had the chance to use is their Internet of Things (IoT) offering. This post seeks to remedy that by creating a simulated IoT device then using it to send telemetry data to the Azure IoT hub.
The Azure IoT hub allows the provisioning and control of millions of IoT devices, as well as providing a central point to manage two-way secure communications between devices and other Azure services.
In order to test out the IoT hub we will follow these steps:
- Create an IoT hub in Azure
- Register a device in our IoT hub
- Build a simulated device using Go, the Gobot framework, and the MQTT protocol
- Send messages from our simulated client to the IoT hub and check that the messages are received.
- A future post will cover routing messages into other Azure services.
Create the Iot Hub
I used the Azure CLI to handle the creation of resources. If you don’t already have it installed, it is available here. After installing the CLI, install the IoT extensions by running the following command, which adds some additional commands for interacting with the Azure IoT services.
az extension add --name azure-cli-iot-ext
Create a new Resource Group and a new IoT Hub. Not all features of the IoT Hub are currently supported in all regions, so it it important to create the resource group in a region that offers all features. I normally create resources in the UK South region, but the Events feature of the IoT Hub is not currently available there. The nearest region offering all features is West Europe. The following commands create a new Resource Group called ‘iot’ in the West Europe region, then creates a new IoT Hub called ‘my-iot-hub’ in the Resource Group ‘iot’ using the free plan ‘f1’.
az group create --name iot --location westeurope
az iot hub create -resource-group iot --name my-iot-hub --sku f1
Then retrieve the connection string for the IoT Hub, which we will need later,
az iot hub show-connection-string --hub-name my-iot-hub --output tsv
which will return something that looks something like this.
HostName=my-iot-hub.azure-devices.net;SharedAccessKeyName=iothubowner;SharedAccessKey=xxxxx...xxxxx
Create the client Device
Before we create the client device, it is worthing installing the Azure Device Explorer. The Device Explorer makes it easy to generate a password that our device will use to connect to the Iot Hub. It will also allow us to monitor the Iot Hub for any messages received from our device.
Create a new device called ‘goclient’ in our newly created Iot Hub
az iot hub device-identity create --hub-name my-iot-hub --device-id goclient
then launch the Device Explorer. Connect to the Iot Hub by pasting the Iot Hub connection string from earlier into the “Iot Hub Connection String” box, and clicking the “Update” button on the Configuration tab.
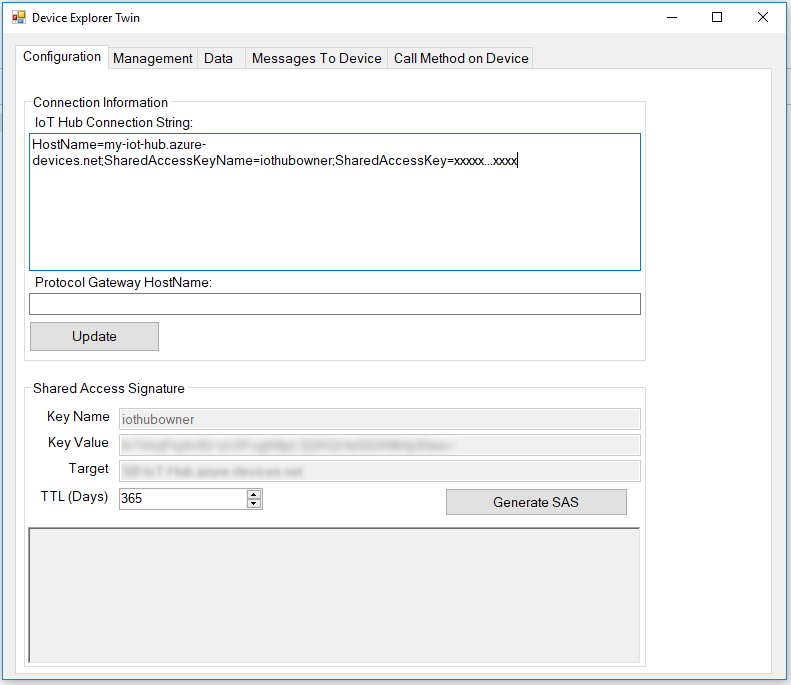
We can then use the Device Explorer to generate a Shared Access Signature (SAS) token, part of which will be used as the password when connecting the device to the IoT Hub. To generate an SAS token, follow these steps
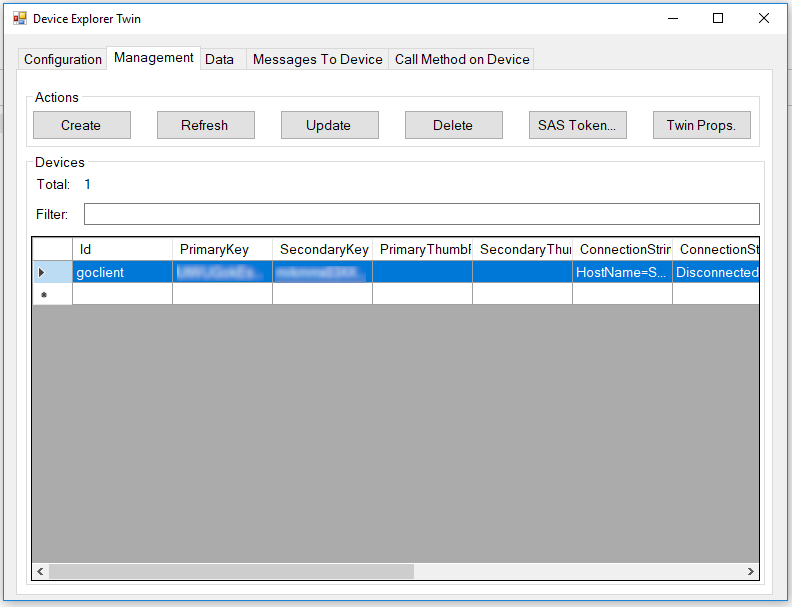
- Click the managment tab
- The new device should be listed
- Click on the device, then click the “SAS Token…” button
- In the dialog box that pops up, set the TTL to 1 day
- Click the generate button
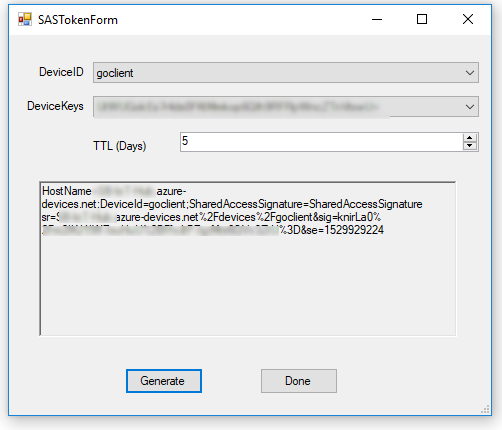
- From the generated SAS token, copy everything from the second SharedAccessSignature until the end to use as the device connection password.
The Code
The client device will not be an actual physical device, but a simulated device written as a simple Go program. One of the things that helps keep this process simple is the robot abstraction implemented in the Gobot package, which allows us to define a piece of work for our device to perform repeatedly based on a time interval. It also offers an abstration over the MQTT protocol (based on the excellent MQTT package written by the Eclipse Foundation), which is used to communicate with the Iot Hub.
Using MQTT to connect to an Azure IoT Hub has several additional restrictions:
- Connections must use TLS/SSL, so must use port 8883.
- Azure uses the Baltimore Root CA certificate to secure the connection, so that must also be used by the client device. The Baltimore Root CA certificate is available here.
- Quality of Service (QoS) level 2 messages are not supported.
- The only available topic is devices/{device_id}/messages/events
I’ve used environment variables to hold the values to be used for the username, password, hostname and device id needed to make the connection to the IoT hub, which take the following format:
- MQTT_HOST - this is the url of the Iot Hub, for example, my-iot-hub.azure-devices.net.
- MQTT_DEVICE - the device id of the client device, for example, goclient.
- MQTT_USERNAME - the username is made up using the format {iot_hub_url}/{device_id}/api-version=2016-11-14, for example, my-iot-hub.azure-devices.net/goclient/api-version=2016-11-14.
- MQTT_PASSWORD - this is password we generated earlier as part of the SAS token in the Device Explorer.
package main

import (
	"fmt"
	"os"
	"time"

	"gobot.io/x/gobot"
	"gobot.io/x/gobot/platforms/mqtt"
)

func main() {
	deviceID := os.Getenv("MQTT_DEVICE_ID")
	username := os.Getenv("MQTT_USERNAME")
	password := os.Getenv("MQTT_PASSWORD")
	host := os.Getenv("MQTT_HOST")

	// TLS/SSL MQTT port
	port := 8883

	brokerURL := fmt.Sprintf("tcps://%s:%d", host, port)

	mqttAdaptor := mqtt.NewAdaptorWithAuth(
		brokerURL,
		deviceID,
		username,
		password,
	)

	// load the Baltimore Root CA certificate
	mqttAdaptor.SetServerCert("BaltimoreRootCertificate.cer")

	// Force the use of TLS/SSL
	mqttAdaptor.SetUseSSL(true)

	err := mqttAdaptor.Connect()

	work := func() {

		// message payload
		data := []byte("hello")

		// topic must be devices/{device_id}/messages/events
		eventTopic := fmt.Sprintf("devices/%s/messages/events/", deviceID)

		// send the message payload to the topic every 5 seconds
		gobot.Every(5*time.Second, func() {
			fmt.Printf("Sending '%s' to IoT Hub topic %s\n", data, eventTopic)
			mqttAdaptor.Publish(eventTopic, data)
		})
	}

	robot := gobot.NewRobot("azbot",
		[]gobot.Connection{mqttAdaptor},
		work,
	)

	err = robot.Start()

	if err != nil {
		fmt.Println(err)
	}
}
Testing
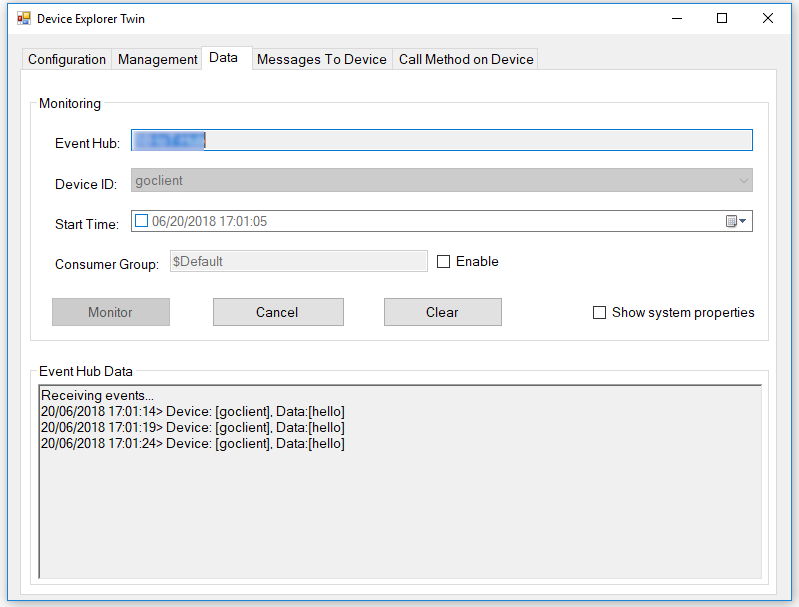
All that is now left to do is test that our device can send messages to the IoT hub. Start the Device Explorer, if it is not already running, and click on the data tab. Select the device from the device drop down, the click the monitor button. The Device Explorer is now connected to the IoT Hub and is listening for messages from our device.
Now run the device code
go run main.go
and our device will send the message “hello” to the IoT Hub every 5 seconds. These messages will show up in the Device Explorer as in the following image
Coming Up
In the next post, I’ll take a look at routing device messages to Azure Functions, and then sending messages back to the device.