Go is not an officially supported language in Azure the way it is on Google Cloud Platform. You can sort of run Go code as part of a web app by installing the “Go Lang for Azure Websites” extension, but this really only allows you to run your code as part of the IIS pipeline, rather than as a standalone server. The best way to run an actual Go server in Azure is via a container. Luckily, Microsoft have just released Container Instances, which provide an easy and cheap way to spin up Docker containers in the cloud.
The following takes you through the steps I used to get a Go web server running in a Container Instance.
Build the web server
First I created the following small Go application. It listens for connections on the port 80, and responds with the text “Hello Azure”. The port can be changed by setting the environment variable PORT to whatever you want.
package main

import (
	"fmt"
	"log"
	"net/http"
	"os"
)

func main() {
	port := os.Getenv("PORT")

	if port == "" {
		port = "80"
	}

	http.HandleFunc("/", handler)
	err := http.ListenAndServe(":"+port, nil)
	if err != nil {
		log.Fatal("ListenAndServe: ", err)
	}
}

func handler(w http.ResponseWriter, r *http.Request) {
	fmt.Fprintf(w, "Hello Azure")
}
Build the container image
The Go code needs to be built as a Linux binary to run within a Docker container, so I set the GOOS environment variable to “linux” before building. Because I’m using the scratch Docker image as my base image, I also needed to compile the code as a purely static binary by setting CGO_ENABLED to 0, and passing in the “-a” and “-installsuffix cgo” flags.
CGO_ENABLED=0 GOOS=linux go build -a -installsuffix cgo -o main .
My Docker file is based on the scratch base image, which is just an empty image. This allowed me to create the smallest image possible, not much bigger than my compiled binary. The file copies the compiled binary of the server into the image, then sets it to start when the image is run.
FROM scratch
ADD main main
ENV PORT 80
EXPOSE 80
ENTRYPOINT  ["/main"]
I built the Docker image then ran it locally to test it using the following commands. This ran it on port 80 of localhost.
docker build -t tophatsteve/my-go-app .
docker run -d -p 80:80 tophatsteve/my-go-app
Deploy the container to Azure
Azure pulls images from a Container Registry, so I needed to publish my image to one. I chose to use Docker Hub, but a private registry can be used just as easily. To push to the Docker Hub I used the following command (I needed to use the “Docker Login” command first to log me into my Docker Hub account).
docker push tophatsteve/my-go-app
Container Instances don’t currently seem to be configurable through the Azure portal, so I needed to use the Azure CLI. If you want to run these commands from your local computer then you will need to install the latest version of the Azure CLI. Alternatively they can be run in the Cloud Shell in your browser.
I first created a resource group to hold my Container Instance. Container Instance’s are not currently available in all regions, so I chose West Europe, which is the closest one to me that provided support.
az group create --name MyContainerInstances --location westeurope
Which returns the following JSON. The important part is the provisioningState setting, which is set to succeeded.
{
  "id": "/subscriptions/xxxxxxxx-xxxx-xxxx-xxxx-xxxxxxxxxxxx/resourceGroups/MyContainerInstances",
  "location": "westeurope",
  "managedBy": null,
  "name": "MyContainerInstances",
  "properties": {
    "provisioningState": "Succeeded"
  },
  "tags": null
}
Next, I ran the following command to provision my Container Instance. I told it the name I wanted for the instance, which resource group to put it in and what Docker image to use. I also added the –ip-address public flag to allow the instance to be publicly accessible.
az container create --name mycontainer --image tophatsteve/my-go-app \
   --resource-group MyContainerInstances --ip-address public
The following JSON output was returned.
{
  "containers": [
    {
      "command": null,
      "environmentVariables": [],
      "image": "tophatsteve/my-go-app",
      "instanceView": null,
      "name": "mycontainer",
      "ports": [
        {
          "port": 80
        }
      ],
      "resources": {
        "limits": null,
        "requests": {
          "cpu": 1.0,
          "memoryInGb": 1.5
        }
      },
      "volumeMounts": null
    }
  ],
  "id": "/subscriptions/xxxxxxxx-xxxx-xxxx-xxxx-xxxxxxxxxxxx/resourceGroups/MyContainerInstances/providers/Microsoft.ContainerInstance/containerGroups/mycontainer",
  "imageRegistryCredentials": null,
  "ipAddress": {
    "ip": "13.69.11.29",
    "ports": [
      {
        "port": 80,
        "protocol": "TCP"
      }
    ]
  },
  "location": "westeurope",
  "name": "mycontainer",
  "osType": "Linux",
  "provisioningState": "Creating",
  "resourceGroup": "MyContainerInstances",
  "restartPolicy": null,
  "state": null,
  "tags": null,
  "type": "Microsoft.ContainerInstance/containerGroups",
  "volumes": null
}
The important things to note from this output are the ipAddress that the container is running on, the provisioningState and the state of the container. In this instance the container will run on IP address 13.69.11.29, the provisioning state is “Creating” and the state is null. We cannot access the container until the provisioningState is “Succeeded” and the state is “Running”, so we will need to wait a few moments while the container starts up.
After a few minutes I checked the status of the container by running the following command, which will produce quite a large amount of JSON output.
az container show --name mycontainer --resource-group MyContainerInstances
The bottom of the output looked like this, with the provisioningState as “Succeeded” and the state as “Running”, showing that the container is now ready.
  ...
  "location": "westeurope",
  "name": "mycontainer",
  "osType": "Linux",
  "provisioningState": "Succeeded",
  "resourceGroup": "MyContainerInstances",
  "restartPolicy": null,
  "state": "Running",
  "tags": null,
  "type": "Microsoft.ContainerInstance/containerGroups",
  "volumes": null
  ...
Test the container
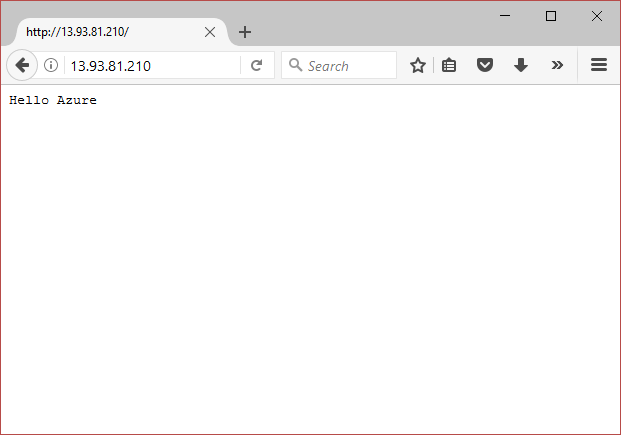
When the instance was running successfully, in order to test it I pointed a browser at the IP Address that I was given when I created the instance.
Delete the container
The final step, in order to avoid unnecessary costs, was to delete the instance using the following command.
az container delete --name mycontainer --resource-group MyContainerInstances