This post shows how to take messages sent by IoT devices and process them using other Azure services. This is a follow up to my earlier post Sending Messages to Azure IoT Hub, and builds on the code and services created in that post. If you haven’t read it, please go back and work through the examples before continuing.
Send a Message from the Device
The first thing I needed to do was change the IoT device code to send meaningful data rather than just a test hello string. In the following code I’ve added a function to generate a random number in the range 10 - 39. We will, for the sake of argument, use this as a temperature reading from our dummy device. This function is then used to send a random temperature to the Azure IoT Hub every 5 seconds.
package main

import (
	"fmt"
	"math/rand"
	"os"
	"strconv"
	"time"

	"gobot.io/x/gobot"
	"gobot.io/x/gobot/platforms/mqtt"
)

func init() {
	rand.Seed(time.Now().UnixNano())
}

func main() {
	deviceID := os.Getenv("MQTT_DEVICE_ID")
	username := os.Getenv("MQTT_USERNAME")
	password := os.Getenv("MQTT_PASSWORD")
	host := os.Getenv("MQTT_HOST")
	port := 8883
	brokerURL := fmt.Sprintf("tcps://%s:%d", host, port)

	mqttAdaptor := mqtt.NewAdaptorWithAuth(
		brokerURL,
		deviceID,
		username,
		password,
	)

	mqttAdaptor.SetServerCert("BaltimoreRootCertificate.cer")
	mqttAdaptor.SetUseSSL(true)

	err := mqttAdaptor.Connect()

	work := func() {
		eventTopic := fmt.Sprintf("devices/%s/messages/events/", deviceID)

		gobot.Every(5*time.Second, func() {
			data := intToBytes(getTemperature())
			fmt.Printf("Sending '%s' to IoT Hub topic %s\n", data, eventTopic)
			mqttAdaptor.Publish(eventTopic, data)
		})
	}

	robot := gobot.NewRobot("azbot",
		[]gobot.Connection{mqttAdaptor},
		work,
	)

	err = robot.Start(false)

	if err != nil {
		fmt.Println(err)
	}
}

func intToBytes(i int) []byte {
	return []byte(strconv.Itoa(i))
}

func getTemperature() int {
	return randInRange(10, 40)
}

func randInRange(min, max int) int {
	return rand.Intn(max-min) + min
}
Create a Function App
I wanted Azure to monitor the incoming messages and alert me if the device goes over a certain temperature. To do this I used an Azure function to check each incoming message, and if the temperature was too high (more than 35 degrees in this example), the function sent out an SMS message to alert me.
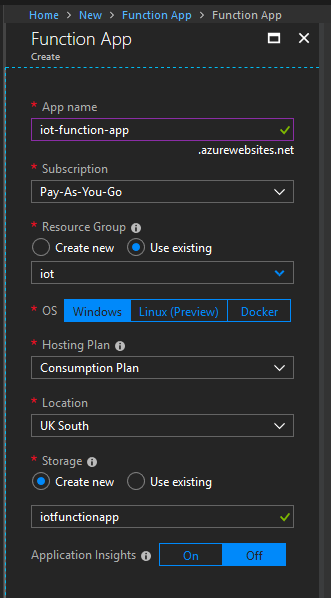
The first step is to create a Function App, which acts as a container for a collection of functions. In order to do this, login to the Azure portal, then
- Click on Create a resource
- In search box type function app
- Click Function App in the drop down that appears
- Click Create on the description blade that is displayed
- Fill in the Function App - Create blade, choosing an App name (I chose iot-function-app), and completing the other fields, then click Create
Once the function app has finished provisioning, I added a function to it. The function contains the actual code to be triggered when a message is received from the device.
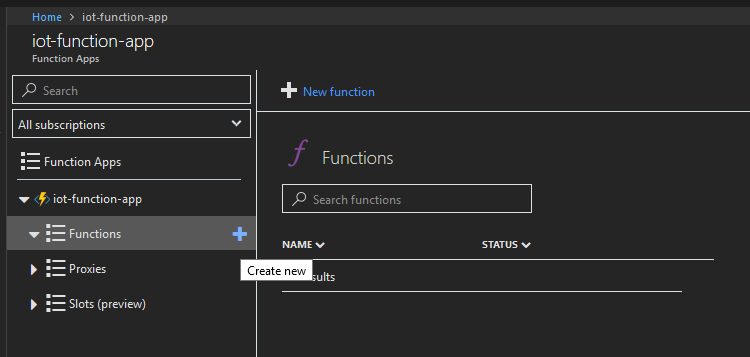
- Open the Function Apps blade and expand the iot-function-app (or whatever you called your function app) node
- In the expanded list, hover over Functions and click the plus sign that appears next to it to create a new function.
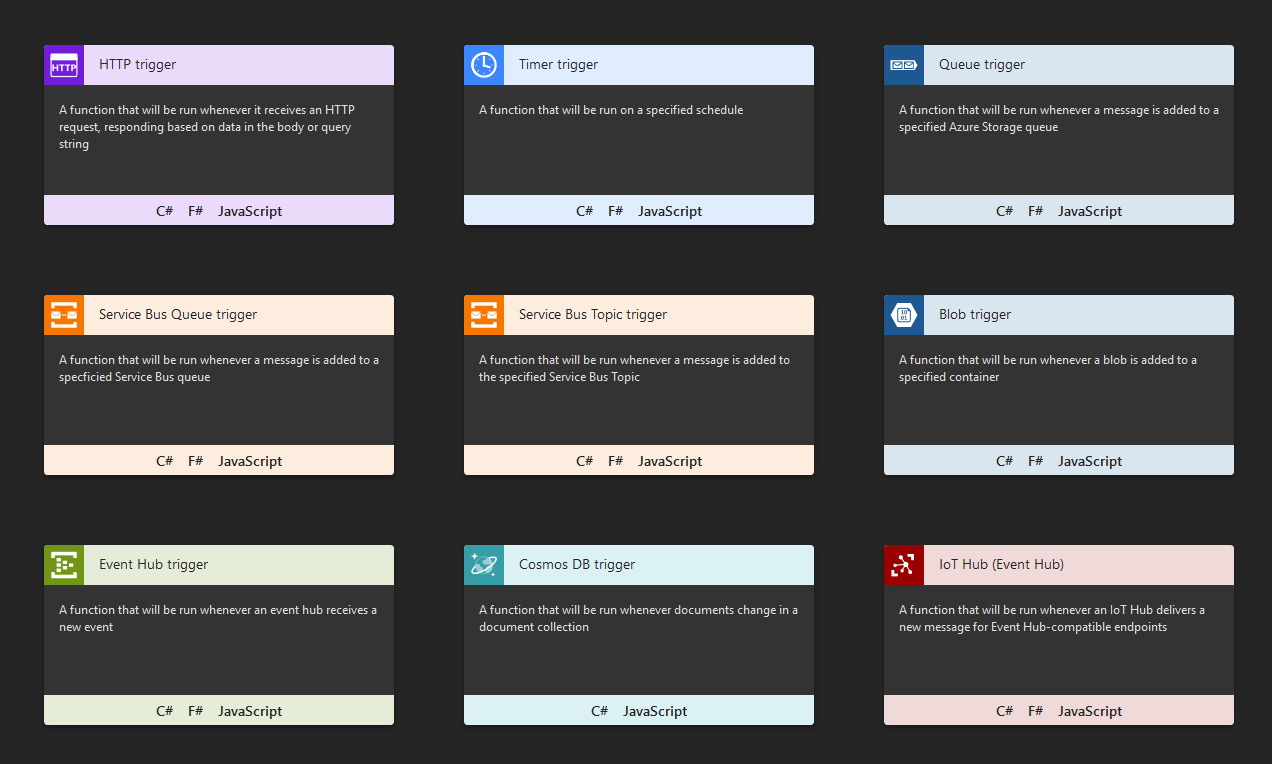
- The page Get started quickly with a premade function is displayed, click the link “Create your own custom function” to get to the function template page. This page changes regularly, so you may need to hunt about the for link.
- On the Choose a template page, click on the JavaScript language option for the IoT Hub (Event Hub) template.
- In the New Function blade, choose a name for the function. I’ve called mine CheckTemperature.
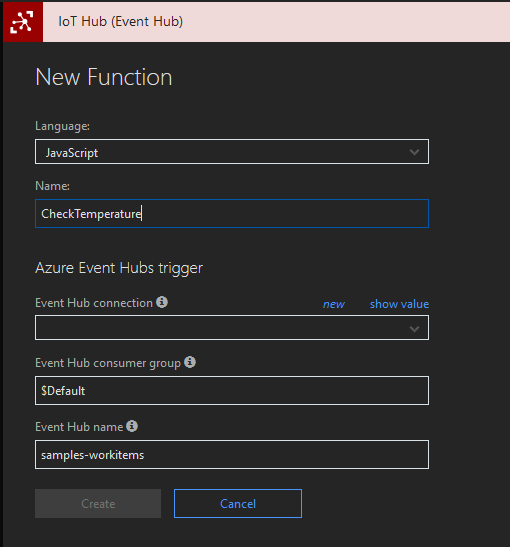
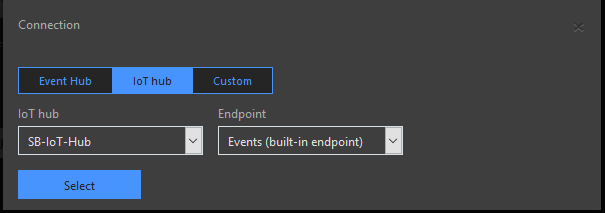
- In order to setup a connection to the Iot Hub, click the new link above the Event Hub Connection box to display the connection configuration dialog, select IoT hub’ and click Select. This will populate the Event Hub Connection box with name of your Iot Hub connection.
- Leave all the other fields in the the New Function blade as their defaults.
- Click Create to finish creating the function.
- This will generate an index.js file containing the initial function that looks like this:
module.exports = function (context, IoTHubMessages) {
    context.log(
      `JavaScript eventhub trigger function called for message array: ${IoTHubMessages}`
    );

    IoTHubMessages.forEach(message => {
        context.log(`Processed message: ${message}`);
    });

    context.done();
};
- and a
function.jsonfile which contains the definition of how the function interacts with other Azure services (in this case EventHub):
{
  "bindings": [
    {
      "type": "eventHubTrigger",
      "name": "IoTHubMessages",
      "direction": "in",
      "path": "samples-workitems",
      "connection": "my-iot-hub_events_IOTHUB",
      "cardinality": "many",
      "consumerGroup": "$Default"
    }
  ],
  "disabled": false
}
Process IoT Events
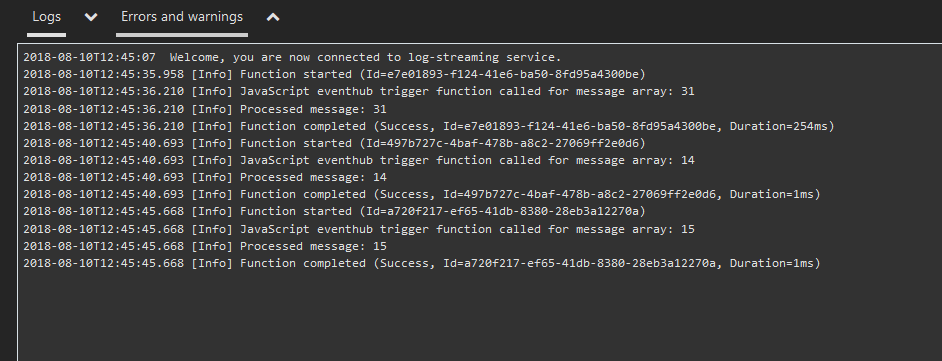
Now that I’ve got a function that will process messages for the IoT device, I can test it by running the device application and bt checking the out put in the functions Logs tab.
go run main.go
Send SMS Message
In order to complete the example and send a text message when the device temperature is too hot, I used the Twilio SMS Connector. In order to use the connector, I created a Twilio account, an application, and a phone number. The instructions on how to set this up are on the Twilio website, and may have changed by the time this article is published, so I won’t go through them here.
After the Twilio setup I had a Security Identifier (SID), an Authorization Token, and a Twilio phone number. I used these values to configure the SMS connector by adding a new binding to the function’s function.json file. The new section looked like this:
{
  "type": "twilioSms",
  "name": "twillioSMSMessage",
  "accountSid": "TwilioAccountSid",
  "authToken": "TwilioAuthToken",
  "direction": "out",
  "to": "+447xxxxxxxxx",            // My mobile phone number
  "from": "+441xxxxxxxxx"           // The Twilio phone number
}
and the full function.json now looked like this:
{
  "bindings": [
    {
      "type": "eventHubTrigger",
      "name": "IoTHubMessages",
      "direction": "in",
      "path": "samples-workitems",
      "connection": "my-iot-hub_events_IOTHUB",
      "cardinality": "many",
      "consumerGroup": "$Default"
    },
    {
      "type": "twilioSms",
      "name": "twillioSMSMessage",
      "accountSid": "TwilioAccountSid",
      "authToken": "TwilioAuthToken",
      "direction": "out",
      "to": "+447xxxxxxxxx",            // My mobile phone number
      "from": "+441xxxxxxxxx"           // The Twilio phone number
    }
  ],
  "disabled": false
}
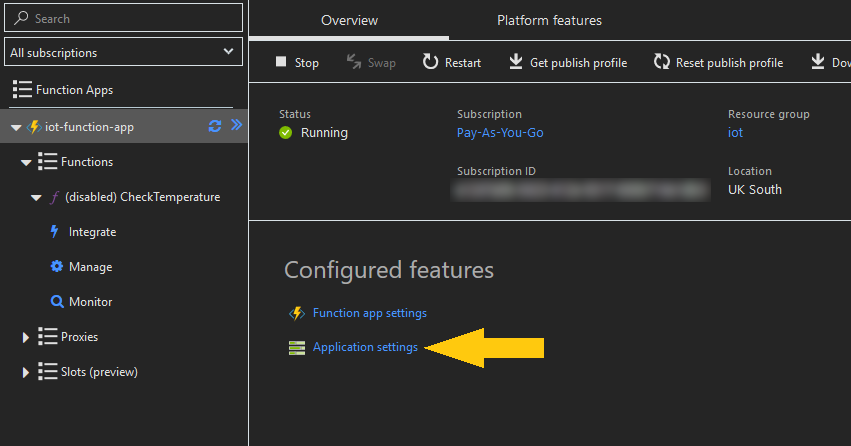
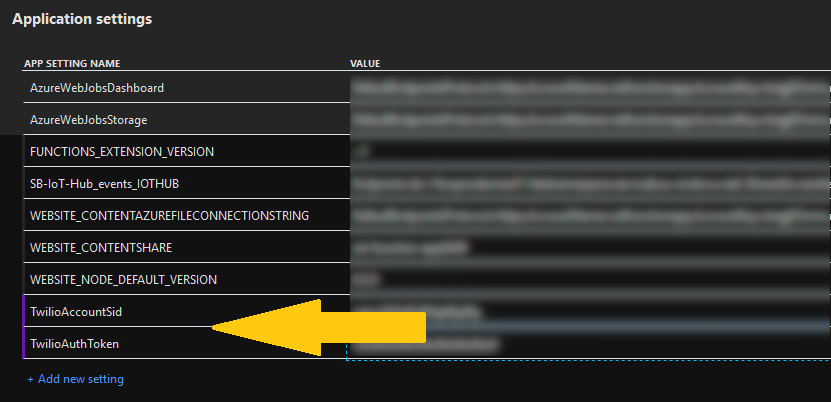
The two values for the accountSid and authToken fields, TwilioAccountSid and TwilioAuthToken refer to application settings with those names which hold the actual values to be used. I added these in the Azure portal by clicking on the function’s name, then clicking on the Application Settings link.
I then added the two new entries into the Application Settings section as in the following image:
The only remaining thing to do was to amend the function to examine the value passed in, and if it was greater than 35, send an SMS message. The final version of the function looked like this:
module.exports = function (context, IoTHubMessages) {

    var overheatingDevices = [];

    // loop through all messages
    for (var x = 0; x < IoTHubMessages.length; x++) {
        // the message payload is the temperature
        var temp = Number(IoTHubMessages[x]);

        // check if the temperature is > 35
        if (temp > 35) {
            // get the id for the originating device from the system properties
            var deviceId = context.bindingData.systemPropertiesArray[x]["iothub-connection-device-id"];
            overheatingDevices.push(deviceId);
        }
    }

    // if any overheating devices, send an SMS via Twillio
    if (overheatingDevices.length > 0) {

        var msg = `Temperature sensor heat warning for devices - [${overheatingDevices.join(",")}]`;

        context.bindings.twillioSMSMessage = {};

        context.bindings.twillioSMSMessage = {
            body: msg
        };
    }

    context.done();
};
Now, running the IoT device will result in a text message being sent to my phone whenever the “temperature” goes over 35 degrees.